Here is shot of the control panel before starting the above activities:


Better than some I have seen. But regardless needed to be stripped.
The overlay was in bad shap, cracked corners, moisture depleted paint, and some corrosion on the plastic that could not be removed. I decided to replace this with a new CP overlay.
I loaded up the wire brush in the drill and set to task on getting the metal control panel to a clean nice brushed finish. And here is the result:

Much Better. Could almost see my reflection. Next I masked the area that was reserved for the overlay, and spray painted the rest a double coating of hammered metal black spray paint from Home Depot (not exactly the same as original, but it looked to damn pretty to pass up).

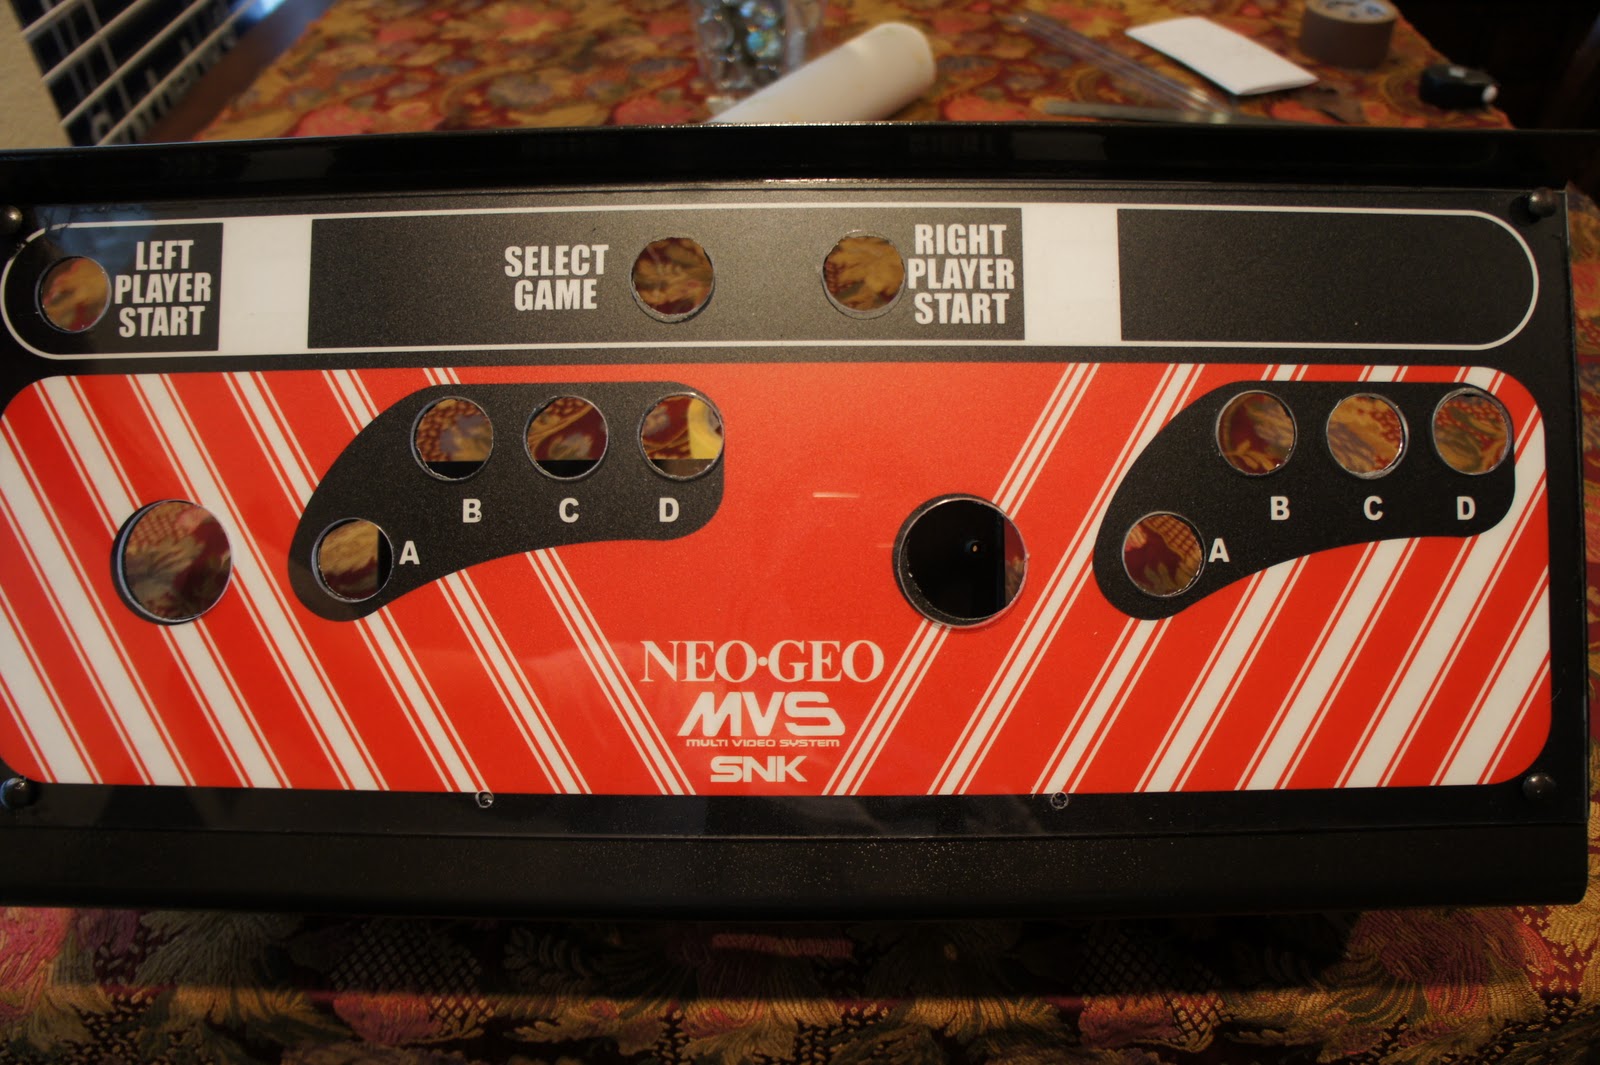
I ordered a new decal from Arcade Overlays LLC, http://arcadeoverlays.com, which came quickly and it had a 3M adhesive back which was perfect. The only complaint was the lack of red cellophane which was suppose to go over the coin counters. Not a big deal, just cut out the square with an exacto and it appeared fine. I topped off the overlay with a thin pre-cut piece of clear 1/4" plexi-glass purchased and cut at Lowe's. used a 1 1/8 and 2" drill hole attachment for the button and controller holes. I also ordered new Carriage bolts (item: CB3/16x3/4PKEG) from Fastenal, for a nice new clean look.
Now for the headphone and memory card sticker, I notice the flyer and brochure showed white instead of yellow as a background. So I took a picture of the sticker as straight as I could. Loaded it into Illustrator as a template and sized it to the exact size of the sticker. I recreated the sticker in Illustration (available to anyone who needs it) and found some glossy sticker paper at Staples. This gave it a fresh paint appearance.
Original Label:

New Label:

And the Coup De Grace, some new controllers and buttons courtesy of Suzo Happ, http://na.suzohapp.com/, I opted for 8 way Competition sticks, and Competition Convex buttons for that added performance (again not original in design, but an added feature for my liking). Couldn't have been happier - rewired the new buttons, and sticks and re-added the memory card module (after a through cleaning of the PCB).
And here is the final finished control panel in all it's glory. Almost brought a tear to my eye :)

No comments:
Post a Comment