Sunday, October 9, 2011

Day 5 - Ventilation and Coin Door

Nearly done. Today I drilled some holes in the rear of the cabinet for ventilation, added some 120 MM fans and fan covers I picked up at Microcenter. The top fan will be exhaust and the lower fan air intake with a fine mesh to keep out the dust and cat hair. It's high on the board to line up with the MVS PCB and allow air to circulate upward.
Here is a shot of the completed ventilation:

With a late night cleaning of the coin door that Lonny provided me, I refreshed the mechanics, lubed the joints and tightened the screws. Lastly I placed the door on the cabinet and masked it in, and finally gave it a new coat of paint. There is nothing like functional coin doors to bring the arcade feeling back home. And with that, it was ready enough to bring inside the home.  
And to post the flyer of the sales brochure for an MVS 25-4, which is perfectly appropriate being Fall here in Colorado:

And here below it is my restored Neo-Geo MVS 25-4, in it's new home. A cubby hole, that I use to think as useless space in my house, is a perfect fit for this monolith of arcade culture.


Quarters are lined up.......GAME ON!!!!!


There are some small details to finish off the cabinet, but I figured I can do those inside:
Coin door lights (on order)
refresh reject button springs (on order)
replace all locks (on order)

End of Blog - Geronimo


Friday, October 7, 2011

Day 4 - Screen Bezel Replacement

The screen bezel that was initially in my cabinet appeared to have some wear, it was crunched in a couple places and didn't look very well positioned around the monitor.
I removed the old one. Finding some artboard at Staples, I cut a square one to the dimensions of the monitor. 
Finally cleaning the monitor and glass, I replaced the bezel with my new one for a simple clean look. 
It was a moderate difference, but the new bezel was much sturdier and would last a long time.

Day 3 - Rebuilding the Control Panel

The Neo-Geo control panel had definitely seen better days, so I was determined to make it look brand new. My first task was to dismantle the control panel and make very specific labels for all the wires as I disconnected each. I also removed the card reader to be thoroughly cleaned.
Here is shot of the control panel before starting the above activities:
Once I got all the buttons and sticks off, I had a clearer picture of the rust and corrosion damage to both the metal and the plastic overlay.

Better than some I have seen. But regardless needed to be stripped.


The overlay was in bad shap, cracked corners, moisture depleted paint, and some corrosion on the plastic that could not be removed. I decided to replace this with a new CP overlay.


I loaded up the wire brush in the drill and set to task on getting the metal control panel to a clean nice brushed finish. And here is the result:


Much Better. Could almost see my reflection. Next I masked the area that was reserved for the overlay, and spray painted the rest a double coating of hammered metal black spray paint from Home Depot (not exactly the same as original, but it looked to damn pretty to pass up).


I ordered a new decal from Arcade Overlays LLC, http://arcadeoverlays.com, which came quickly and it had a 3M adhesive back which was perfect. The only complaint was the lack of red cellophane which was suppose to go over the coin counters. Not a big deal, just cut out the square with an exacto and it appeared fine. I topped off the overlay with a thin pre-cut piece of clear 1/4" plexi-glass purchased and cut at Lowe's. used a 1 1/8 and 2" drill hole attachment for the button and controller holes. I also ordered new Carriage bolts (item: CB3/16x3/4PKEG) from Fastenal, for a nice new clean look.

Now for the headphone and memory card sticker, I notice the flyer and brochure showed white instead of yellow as a background. So I took a picture of the sticker as straight as I could. Loaded it into Illustrator as a template and sized it to the exact size of the sticker. I recreated the sticker in Illustration (available to anyone who needs it) and found some glossy sticker paper at Staples. This gave it a fresh paint appearance.
Original Label:


New Label:

And the Coup De Grace, some new controllers and buttons courtesy of Suzo Happ, http://na.suzohapp.com/, I opted for 8 way Competition sticks, and Competition Convex buttons for that added performance (again not original in design, but an added feature for my liking). Couldn't have been happier - rewired the new buttons, and sticks and re-added the memory card module (after a through cleaning of the PCB). 

And here is the final finished control panel in all it's glory. Almost brought a tear to my eye :)

Day 2 - Cabinet Paint and Patching

After the cabinet was thoroughly cleaned. One major need was to cut some doors for the back as there were no doors originally.  With help from my brother-in-law and a stop to Lowe's, we scored a 3/4" particle board and were able to have it cut to the appropriate size. I painted it black and added hinges to the bottom door.
Here is a picture of the original backing:

A bit dusty and in need of some love. Here is a shot after the particle board was cut and added to the cabinet rear:

Great improvement. I plan to add some 120MM fans as intake and outtake to the boards to provide cooling to the cabinet. The rear of the cabinet was sufficiently masked and painted with a nice a black Matte spray paint. this came out well and gave the cabinet a clean fresh appearance.

One bad section on the cabinet wood was to the right of the monitor, where a big chunk of wood was missing from the right panel.

This was patched with Wood Putty and then spray painted with the black Matte Spray paint.

After it dried I was satisfied as it came out nicely. Some touch-up was then done on the right and left panels and red portions with a cherry red touch-up paint. The only major spots were some gashes in the upper top of the left panel.

The paint I had for the red was too dark. This is ok as it's temporary. In the future I will replace the entire laminate on the panels. 


Overall the paint job went well, and next I can focus on the control panel which needs an overhaul. Fortunately all the screws and bolts are in good conditions, just need to replace paint, overlay, button and sticks.

Monday, October 3, 2011

Day 1 - Choosing a Cabinet

My name is Geronimo, and as an avid arcade gamer, there is no other stand-up arcade game that had more wow factor, in my opinion, than the Neo-Geo line of arcade games. Though I spent more days in front of a Street Fighter II machine growing up and hundreds of others, the Neo-Geo has a special place in my heart and captures the peak of gaming in the early 90's for me. It's always been a dream of mine to have a fully functional arcade game in my home, and because of my limited space, I can't think of a better option than a Neo-Geo arcade cabinet.
So my first objective was finding the right cabinet. A quick check on Craigslist and I immediately found two. One was a little too beat up for my taste. The 2nd, a MVS 25-4 version 3, had a few important details going for it; a new screen and a fairly solid condition of the wood cabinet. Big props to Lonny at SecretStorageAuction.com for answering all my questions, being so hospitable and finally hooking me up with the right cabinet to get my dream project started. (Lonny is doing some amazing things for the classic Arcade and Pinball community).
The cabinet was delivered and I spent the rest of the day and night cleaning the exterior panels and inside walls and components. This was a large task as it was caked with dust inside and the wood was slightly moldy. Fortunately I picked up some Mold Armor from HomeDepot and got the cabinet cleaned up as best I could with a light cleaning solution.
Some of the major tasks will be:

  • Repainting and patching wood panels (touch up on logos)
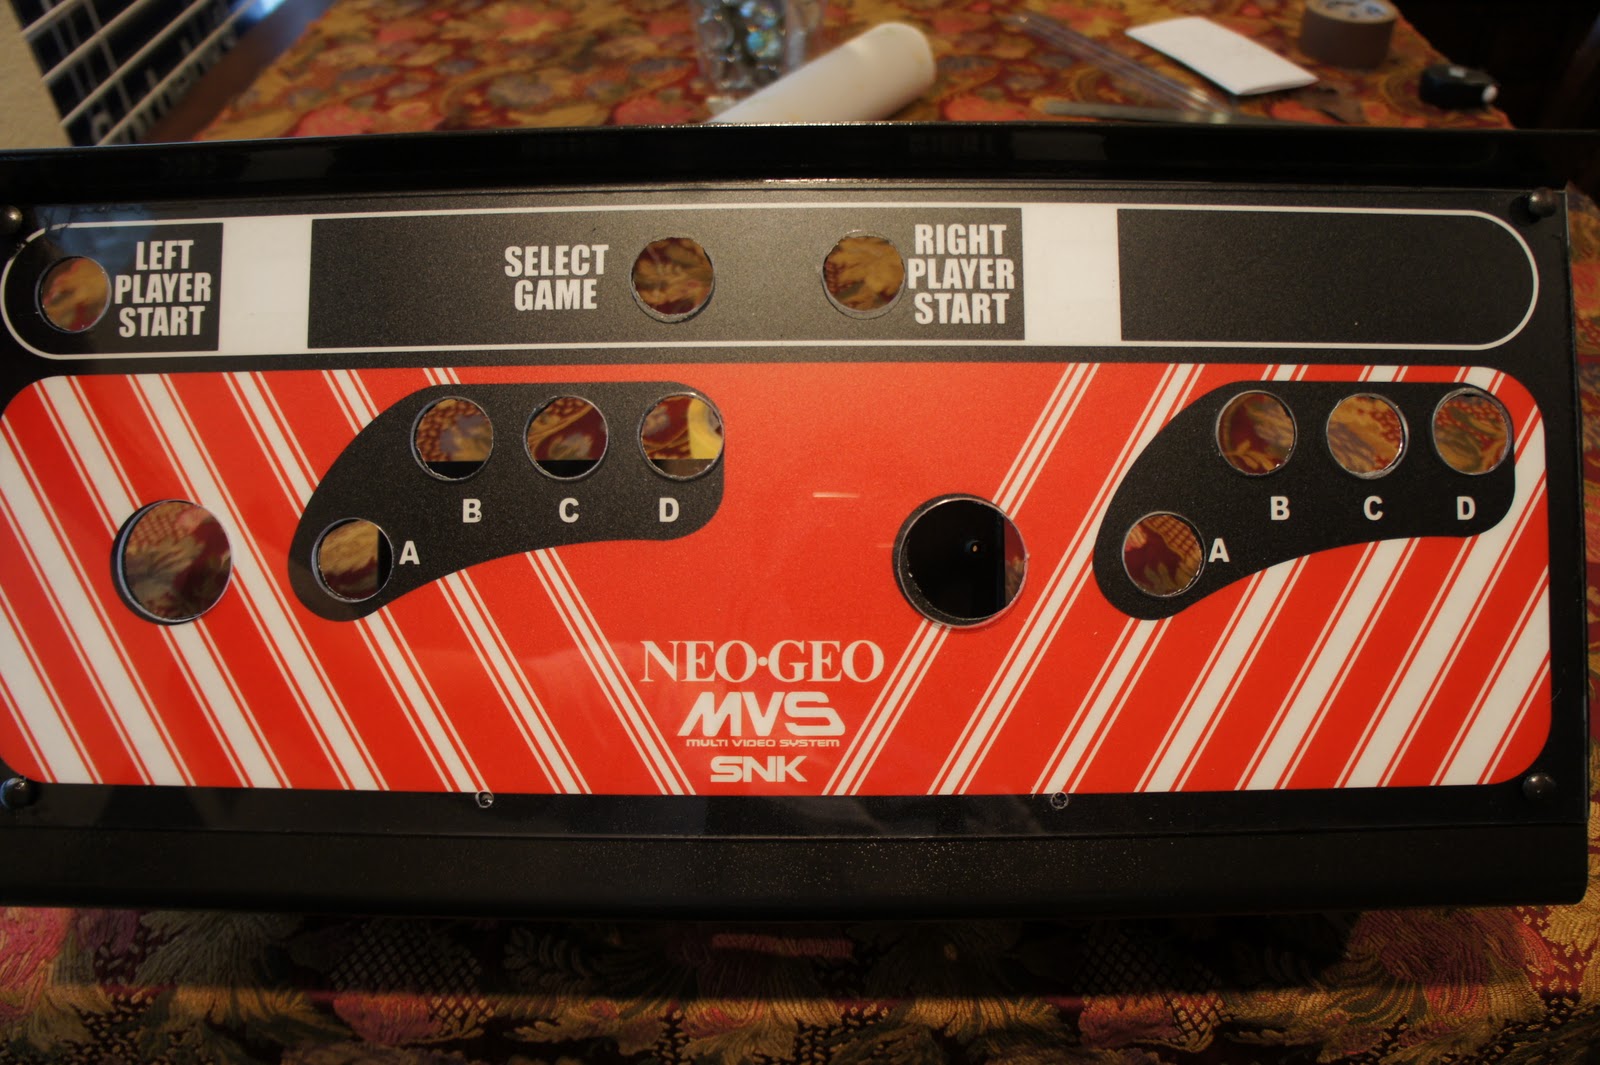
  • Repainting and refreshing graphics on control console.
  • Replacing console overlay, current one is corroded with rust
  • Replacing Sticks and Buttons
  • Replacing Screen Bezel (current one is bent)
  • Replacing Coin Doors
  • Cleaning up wiring

To be faithful to the Neo-Geo fan community, I am focused on restoring this cabinet to its original condition, or as close as I can get. Here are some shots of its original condition before I make any modifications:
(Cabinet left) As you can see it's it fairly good condition. Especially as far as the wood paint goes. 

(Marquee) The Marquee was is in awesome condition. The light was not hooked up, but I can deal with that later. Also it was locked and I don't have the key. May drill out and replace the locks.  

(Cabinet right) Some scuffing on the panels and the console plastic is corroded in spots. This console will be repainted and rebuilt. 

(Under Console) The paint will be stripped and the memory card and headphone sticker will need to be replaced. I will likely create my own as close to the original as possible.

(Coin Door) Lonny hooked me up with a replacement coin door. Just need to get matching coin button lights for it.

(bottom opening) It has already been cleaned, and this shot already includes work that was done, but I included it anyway to show the rear.

(Top opening) A well working Wells Gardner 25" Zenith Tube, a staple of stand-up arcade cabinets.

The plan is to work on items in this order:

  1. Wood and Paint Corrections
  2. Control Panel Repaint
  3. Control Panel sticks and buttons Replace and replace Graphics
  4. Screen Bezel Replacement
  5. Coin Doors and Locks
  6. Wiring Corrections